LED Wall Washer Outdoor Lighting: Wall Washers vs LED Strip for Facades
When a bare LED strip is enough for a facade and when you need a lensed wall washer: grazing vs washing, beam angles, setback, sealing, control and a worked 60 ft layout.
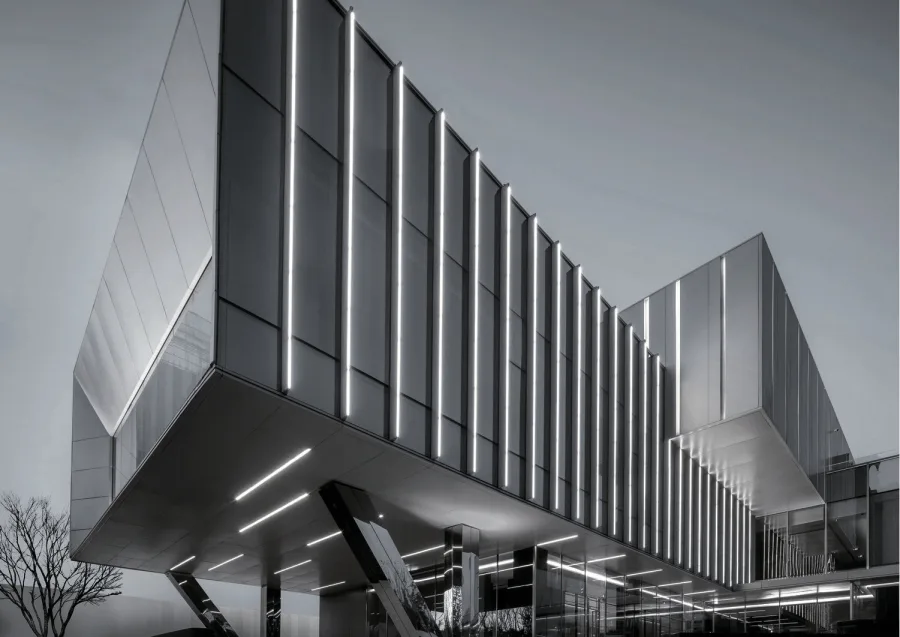
An LED wall washer for outdoor use is a linear fixture or lensed strip that puts its light onto a wall instead of into the space around it. A bare LED strip does that poorly on anything taller than about one story: its wide beam lights the first few feet brightly and leaves the top of the wall dim. A lensed wall-washer strip squeezes the same light into a narrow or asymmetric beam that reaches up the facade. The choice comes down to wall height, surface texture and whether you want to show that texture or flatten it.
Grazing vs Washing: Same Wall, Different Result
Both techniques light a vertical surface from a line of light near the wall. The difference is distance, and distance controls the angle at which light hits the surface.
Grazing puts the light source tight to the wall, typically 4 to 12 in away, aimed straight up or down along it. Light arrives at a very shallow angle. With the source 6 in out, light reaching a point 10 ft up hits the wall at under 3° from the surface. Every bump and mortar joint casts a long shadow, so stone, brick, board-formed concrete and ribbed metal come alive. The downside: grazing also shows every flaw in wavy stucco or uneven panels.
Washing moves the source away from the wall, often 2 ft or more, so light arrives at a steeper angle. Move the same source 3 ft out and the light reaching 10 ft up meets the wall at about 17°. Shadows shrink, texture flattens, and the wall reads as an even field of light. Washing suits smooth stucco, painted surfaces, signage walls and anywhere you want brightness without drama.
Most facade projects use both: grazing on the stone base or entry wall, washing on the smooth upper floors.
Why Bare LED Strip Struggles on Tall Facades
A typical bare SMD or COB strip emits light over a wide beam, around 120°. That's great inside a cove or a channel with a diffuser, where you want soft, wide light. On a facade it causes three problems.
- Much of the light misses the wall. Half of a 120° beam aimed up from the base of a wall heads outward, into the landscape, the sidewalk or the sky.
- The bottom gets most of what's left. The wall right above the strip is close and gets bright light. Twenty feet up, the same light is spread over a much larger area and arrives at a grazing angle, so the top of the wall goes dim. You end up with a bright band at the base fading to nothing.
- The source is visible. People across the street see the bright line of LEDs, not just the lit wall.
A lensed wall-washer strip puts an optic over each LED, or a continuous lens over the line, that narrows the beam in the direction that matters. A narrow beam aimed up the wall pushes more of the light toward the top and keeps it off the street. Some wall washers offer asymmetric optics, with a narrow beam in one axis and a wider one in the other, so you can throw light up the wall while spreading it along the run for even blending between sections. You'll find lensed strips in the wall washer collection, with beam options listed per product.
Choosing a Technique and Optic by Surface and Height
Start with the wall, then pick the beam. Treat these as typical starting points and confirm against the product's photometric data, since beam and output vary by product.
| Surface and height | Technique | Typical optic | Mounting notes |
|---|---|---|---|
| Stone, brick or block, up to 12 ft | Grazing | 30° to 60° | 4 to 8 in from the wall, at the base or in a ledge |
| Stone or ribbed panel, 12 to 30 ft | Grazing | 10° to 20° | 6 to 12 in out; consider a second run halfway up |
| Smooth stucco or paint, up to 12 ft | Washing | 45° to 60°, or asymmetric | Set back 18 to 30 in, or mount at the top aiming down |
| Smooth wall, 12 to 30 ft | Washing | 15° to 30°, or asymmetric | Set back 2 to 4 ft; test aiming on site |
| Columns, pilasters, fins | Grazing | 10° to 15° | Tight to the surface; one line per face |
| Glass curtain wall | Don't wash | n/a | Glass reflects or passes the light; light mullions or the interior instead |
| Soffits and canopies | Washing | Wide, often a diffused strip | Run along the fascia or a recess, aimed across the soffit |
Two rules of thumb hold across the table. The taller the wall, the narrower the beam you need to reach the top. And the closer you mount to the wall, the more texture you reveal.
Beam Angle, Setback, Spacing and Aiming
Beam angle. Narrow optics (around 10° to 15°) for walls above two stories. Medium (around 25° to 40°) for one to two stories. Wide (45° to 60°) for low walls, planters and retaining walls, where a narrow beam would leave a hot stripe. If you're unsure, mock up two optics on the actual wall at night before ordering the whole run.
Setback. For grazing, keep the setback small and consistent. A strip that wanders from 4 in to 9 in along a 40 ft run shows up as uneven brightness. For washing, setback is a balance: further out gives a more even wash but sends more light past the wall and makes glare harder to control.
Spacing between runs. A continuous strip has no spacing gaps along its length, unlike individual fixtures. Watch the ends instead: butt sections tightly and stop runs at architectural breaks such as corners and expansion joints, where a dark gap looks intentional.
Aiming. Use adjustable brackets so you can tilt the line a few degrees toward or away from the wall. Aim the brightest part of the beam at the top third of the wall, not the middle, and let the spill light the bottom. Do the final aiming at night; it can't be done well in daylight.
Top-down vs bottom-up. Lighting from a parapet or ledge aimed down keeps light off the sky and out of drivers' eyes. Lighting from grade aimed up is easier to service and to wire. For tall walls, a run at the base and another at mid-height ledge often gives a more even result than one run trying to throw 40 ft.
Outdoor Ratings, Sealing and Mounting
Outdoor strip lives with rain, sprinklers, UV and temperature swings. Check three things on the spec sheet.
- IP rating. Exposed facade runs typically call for IP65 at minimum and IP67 where water can sit or the run is near grade and gets splashed. The IP ratings guide explains what each digit tests. Confirm the rating applies to the whole assembly you'll install, including end caps and cable entries.
- Jacket and lens material. UV-stable silicone holds up better outdoors than PVC, which can yellow and stiffen. Ask what the lens is made of and how it handles sun.
- Connections. Most outdoor failures are at field cuts and splices, not in the strip. Use the manufacturer's sealed end caps and connectors, seal every cut the way the instructions say, and make wire connections in a rated enclosure.
Mount the strip in an aluminum channel or bracket that holds the aim and carries heat away. The interior wall-wash channels are built for washing and grazing indoor walls, and they're a good reference for how the profile shapes the light. Outdoors, use a strip and mounting system that the product data says is suited to the location. Leave weep paths so water drains out of channels and don't seal a channel airtight with the strip inside. Allow for thermal expansion on long aluminum runs.
Drivers belong in a dry, ventilated, accessible location, often inside the building or in a rated enclosure. Keep line-voltage work to a licensed electrician, and confirm wet-location and outdoor wiring requirements with your local inspector.
Color: Static White, RGBW or RGB+CCT
Most facades should be static white: 3000K or 3500K on stone and brick, 4000K on concrete, metal panels and modern glass buildings. Keep one CCT across the whole building unless the material changes.
Color makes sense for hospitality, entertainment venues, civic buildings that light up for events, and brand facades:
- RGBW adds a dedicated white chip, so the building can sit at a clean white most nights and change color for occasions.
- RGB+CCT adds both warm and cool white chips, so you can tune the everyday white as well as run color.
- RGB only makes white by mixing, and that white usually looks tinted. Skip it for buildings that will be white most of the time.
Large facades need serious control. Many zones, long cable distances and scheduled scenes point toward DMX, which runs longer distances and is the standard for architectural lighting consoles. Pixel effects across a facade usually mean addressable strip. Our article on SPI vs DMX for addressable strip covers which protocol fits which job.
Light Pollution and Glare Toward Neighbors
Facade lighting that spills into the sky or into bedroom windows across the street draws complaints and, in many places, violates local outdoor lighting ordinances. Some cities and counties limit uplighting, set curfews or cap brightness. Check what applies before design, not after install.
- Keep the beam on the building. A narrow optic with the right aim puts more light on the wall and less over the parapet. Stop the beam at the roofline; light that goes past the top is wasted.
- Prefer top-down where the architecture allows. It keeps light out of the sky.
- Hide the source. People on the street should see a lit wall, not a line of bright LEDs. Recess the strip, use a shielding lip on the channel, or position it behind a curb, planter or ledge.
- Light less. Facades usually need far less brightness than people expect. A dimmable system lets you set the level on site.
- Use a schedule. Dim or switch off after a set hour. Most controllers and DMX systems can run a time-based schedule.
Dark-sky guidance generally comes down to the same points: light only what needs it, only when needed, at the lowest level that works, with warmer color temperatures preferred.
Worked Example: A 60 ft Facade
Say you're grazing a 60 ft wide, two-story stone facade from grade, using a 24V lensed wall-washer strip whose spec sheet lists 6 W/ft. You want the wiring on the low-voltage side to stay Class 2.
- Total load: 60 ft × 6 W/ft = 360 W.
- Class 2 limit per driver: a 96 W Class 2 driver loaded to 80% carries 76.8 W, or 12.8 ft of 6 W/ft strip. The Class 2 driver article explains the limit.
- Zones: 60 ÷ 12.8 = 4.7, so five zones of 12 ft. Each zone is 12 × 6 = 72 W.
- Driver per zone: 72 ÷ 0.8 = 90 W minimum, so a 96 W Class 2 driver for each, five in total.
- Current per feed: 72 ÷ 24 = 3.0 A.
- Line side: 360 W of strip at an assumed 90% driver efficiency draws about 400 W, or 3.3 A at 120V. Check your actual driver's efficiency on its spec sheet. One branch circuit handles it easily.
Check the strip's own published maximum run too. If the spec sheet lists a run shorter than 12 ft per feed, use more zones.
Now the feed wire. The drivers sit inside a mechanical room, and the longest home run to a zone is 40 ft. At 3.0 A:
| Feed length | Wire | Drop | % of 24V |
|---|---|---|---|
| 15 ft | 16 AWG | 0.36 V | 1.5% |
| 25 ft | 16 AWG | 0.60 V | 2.5% |
| 40 ft | 16 AWG | 0.96 V | 4.0% |
| 40 ft | 14 AWG | 0.61 V | 2.5% |
| 40 ft | 12 AWG | 0.38 V | 1.6% |
Use 14 AWG on the far zones and keep 16 AWG for runs under about 25 ft. Use wire rated for the location: direct burial or wet-location rated where it runs outdoors. Plug your own strip and lengths into the power supply calculator to check the driver sizes.
Five zones also let you dim the zones near a neighbor's windows or switch the end zones off after midnight.
Common Mistakes
- Using bare 120° strip on a two-story wall. The base glows, the top disappears, and the neighbors see the LEDs.
- Grazing a smooth wall. Grazing exaggerates every wave and patch in stucco or paint. Wash smooth walls; graze textured ones.
- Inconsistent setback. A grazing run that drifts closer and further from the wall shows bright and dim patches you can't fix with dimming.
- Unsealed field cuts. Water gets in at the cut, not in the middle of the reel. Seal every cut and connection to the product's instructions.
- Mixing color temperatures across sections or buying the second half of a job from a different batch. Order the whole facade at once, with the same CCT and bin.
- Ignoring the parapet. Light that runs past the top of the wall goes straight into the sky.
Frequently asked questions
What is the difference between wall grazing and wall washing?
Grazing mounts the light very close to the wall, typically 4 to 12 in, so light skims the surface and shows texture with long shadows. Washing sets the light further back so it hits at a steeper angle, which flattens texture and gives an even field of light.
Can I use regular LED strip as an outdoor wall washer?
On low walls up to about 8 to 10 ft, a sealed outdoor strip in a channel can work. On taller facades, a bare strip's wide beam lights the base and leaves the top dim, so a lensed wall-washer strip with a narrow or asymmetric optic does a much better job.
What beam angle should I use for facade lighting?
As a typical starting point, use narrow optics around 10° to 15° for walls above two stories, 25° to 40° for one to two stories, and 45° to 60° for low walls. Confirm with the product's photometric data and a night mock-up on the actual wall.
What IP rating do I need for an outdoor LED wall washer?
Exposed facade runs typically need IP65 at minimum, and IP67 where water can sit or the run is near grade and gets splashed. Check that the rating covers the whole installed assembly, including end caps, cuts and cable entries.
How do I keep facade lighting from causing light pollution?
Use narrow optics aimed so the beam stops at the roofline, light top-down where you can, hide the source from the street, keep levels low and dim or switch off on a schedule. Check local outdoor lighting ordinances before design.
Specify with ENKORA
Working on a project? Send us the drawings and we will propose strips, profiles and drivers that fit together.