LED Stair Lighting Strip: Tread, Handrail and Step Details
Where to put LED strip on a stair, how to feed fourteen treads without a mess of splices, and how to size the drivers, with the numbers worked out.
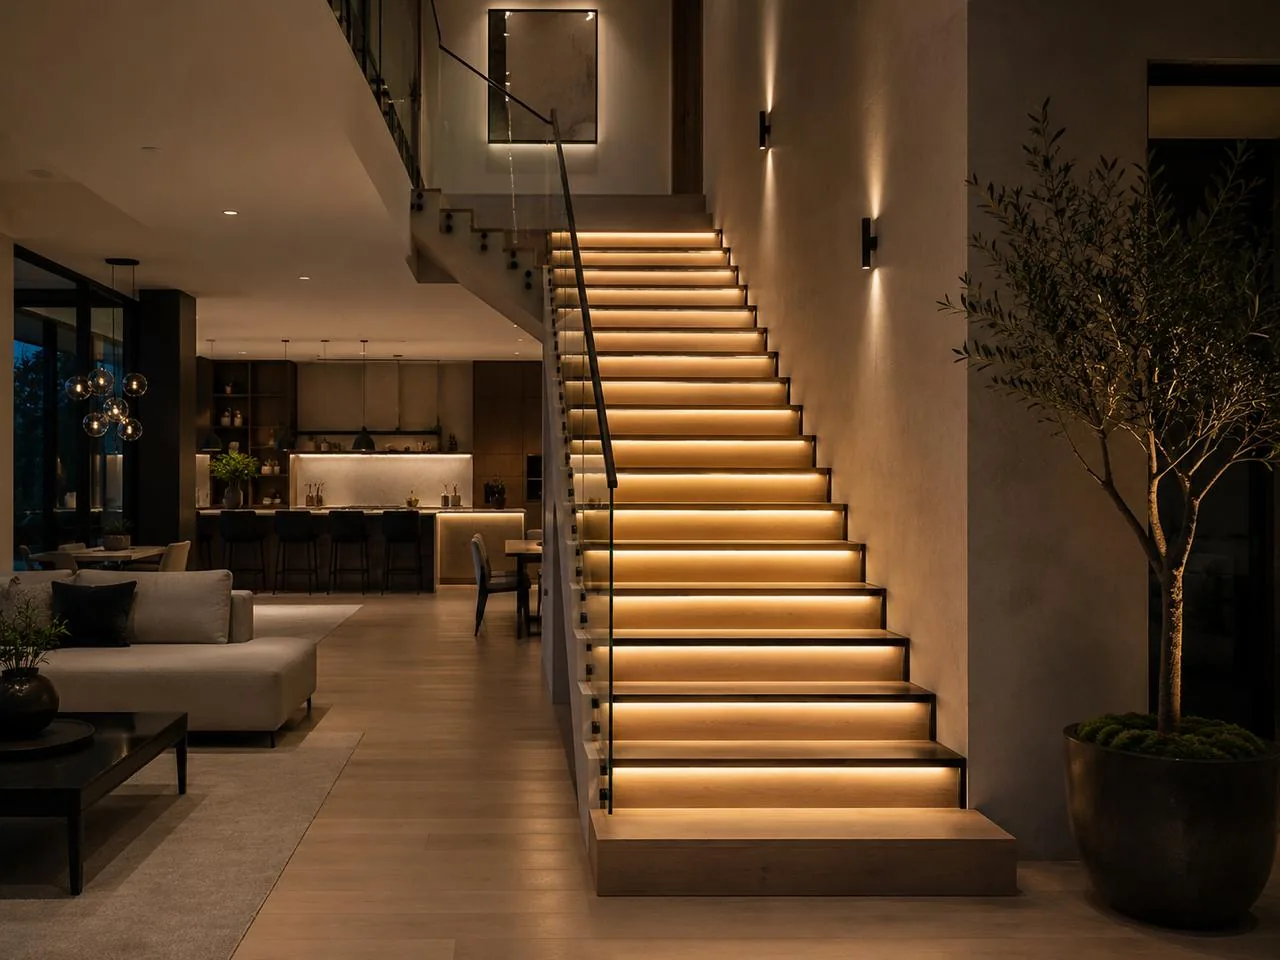
An LED stair lighting strip works best tucked under the nosing of every tread, aimed down so the light grazes the riser and lands on the step below. Done that way, every tread edge reads clearly, nobody walking down sees the source, and a 24V strip at a few watts per foot does the job. The other two positions, a line recessed in the wall beside the steps and a strip inside the handrail, solve specific problems: stairs where you can't touch the treads, long flights and exterior steps.
Below: how the three positions compare, how to plan an under-nosing install from channel to driver, handrail and sensor options, outdoor stairs, and a worked 14-tread example.
Three Places to Put LED Strip on a Stair
Most stair lighting is one of three layouts. They light the same steps in very different ways.
| Position | Light effect | Glare risk | Best for |
|---|---|---|---|
| Under each tread nosing | A soft wash down each riser and onto the tread below; every edge reads as a line | Low when the nosing lip hides the strip; higher on open-riser stairs seen from below | Closed-riser interior stairs, new construction, hospitality |
| Recessed in the wall or stringer beside the steps | Light across each tread from the side, brightest near the wall | Moderate: a bright line at ankle height can be in view when you walk down | Stairs with a solid side wall, retrofits where the treads stay untouched, exterior steps |
| In or under the handrail | A continuous wash down onto the treads from about 34 to 38 in above them | Low when the diffuser faces down and sits inside the rail profile | Long flights, commercial and exterior stairs, glass guards |
Under-nosing light gives the strongest step-by-step definition, which is what makes a stair safe at night: your eye picks up each edge before your foot does. Wall lines are easier to retrofit but light one side of the tread more than the other. Handrail light is even along the whole flight and keeps every source out of the treads, but it needs a rail designed or modified to carry a channel.
Many good stairs use two of these together: under-nosing strip on the steps and a handrail line for the landings, or wall lights on the run and a strip under the top nosing so the first step down is never in shadow. The stairs and handrails collection groups the strip types that suit these positions.
Planning Under-Nosing Strip, Step by Step
1. Choose the channel
Don't stick bare strip under a tread. A channel protects it from shoes and vacuums, spreads heat and gives you a straight line. Three options cover most stairs:
- A small surface channel glued or clipped under the nosing lip. Quickest on existing stairs, as long as the nosing overhangs enough to hide it (most residential nosings project about an inch).
- A recessed channel routed into the underside of the tread. The cleanest result on new wood treads; the stair maker cuts the groove before finishing.
- A stair channel that forms the edge itself, set into tile, stone or wood flooring so the nosing and the light are one piece. These live with the in-floor channels.
For the routed version, the recessed channels list each profile's width and depth, which is what the router bit and template are set to.
2. Aim the light so it grazes the riser
Mount the channel as far back under the nosing as the overhang allows, close to the riser face, and aim it straight down. The light then skims the riser and spreads onto the tread below. A strip at the very front edge throws light forward instead, where it ends up in the eyes of anyone walking up.
Grazing light has one catch: it shows every flaw in the surface it skims. A drywall riser with a taped seam or roller marks will look worse lit than unlit. Ask for a level 5 finish or a solid riser material if the stair is getting under-nosing light.
3. Hide the dots
From the floor below, and on any open-riser stair, people look up at the underside of the nosings. A dotted line of LEDs is obvious from there, and polished stone or lacquered treads reflect the dots back a second time. Two fixes:
- COB strip, which has a continuous phosphor line and no visible dots even in a shallow channel.
- A deeper channel with an opal (frosted) diffuser, which gives dense SMD strip room to blend before the light leaves the channel.
On glossy treads, use both.
4. Feed each tread
Fourteen treads means fourteen short pieces of strip, and each needs power. There are two ways to get it there.
- Daisy-chain. A short pair of wires jumps from the end of one tread's strip down to the next, usually hidden in a groove behind the skirt board or along the stringer. Fewer wires and one feed per zone, but the whole zone switches as one, and every jumper joint is a potential failure point inside the finished stair.
- Individual leads from a home run. Each tread gets its own two-conductor lead back to a distribution block or controller near the driver. More wire, but each step is separately serviceable, and it's the only way to run a step-by-step sequence with plain single-color strip.
Decide on controls before rough-in, because you can't add home-run leads once the skirt boards are on. On new work, drill the stringer or the riser at the end of every tread, pull leads, leave a service loop at each and label them by step number.
5. Put the driver somewhere you can reach
The closet under the stair, a utility room behind it, or a ceiling access panel at a landing all work. A driver sealed inside the stair structure is a future demolition job. Keep the controller beside it.
Handrail Lighting
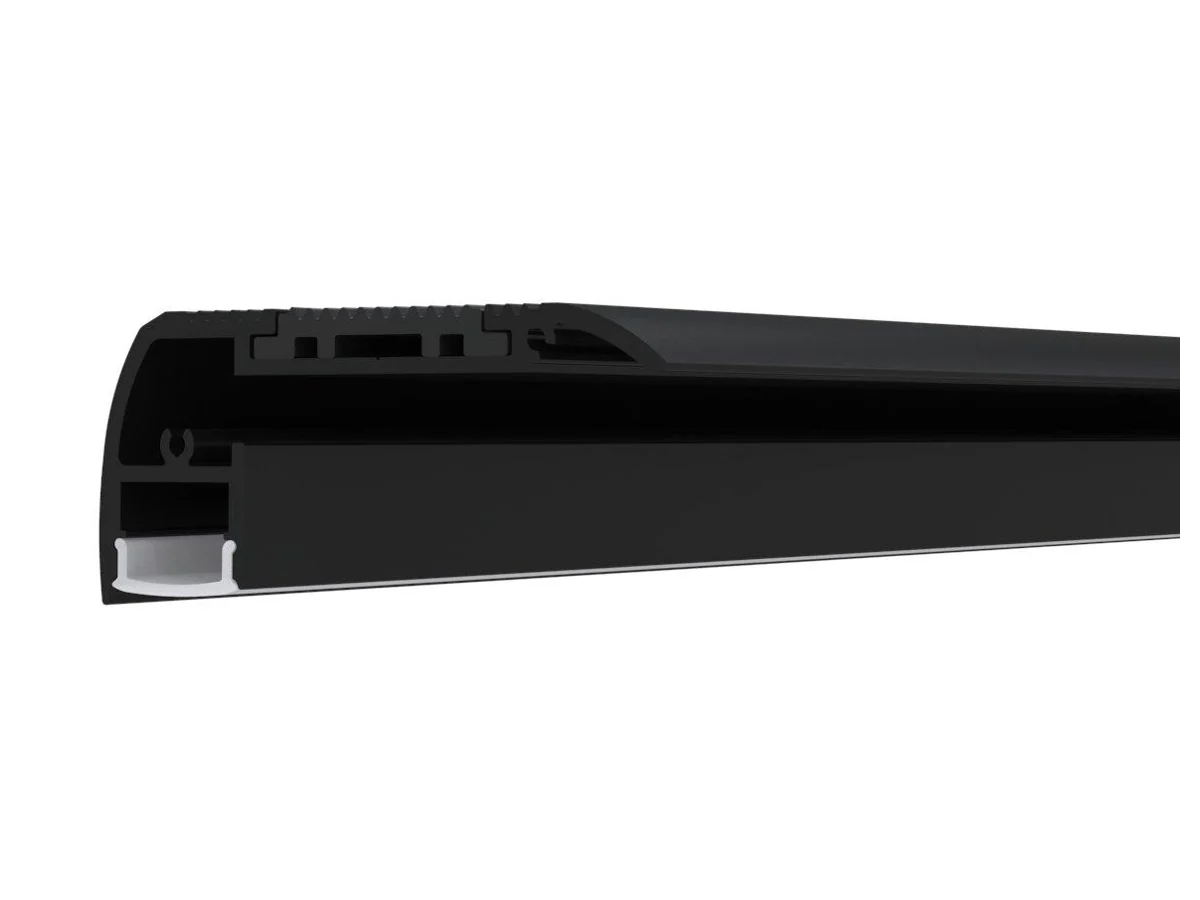
Handrail lighting puts a strip in a channel inside or under the rail, pointing down onto the treads. On wood rails, the shop routes a groove in the underside and the channel drops in flush. Metal rails can be built around a channel from the start. Either way, the diffuser should face straight down and sit inside the rail profile, so a person on the stair never sees the strip itself.
Wire routing is the hard part. The feed usually comes up through a hollow metal post or a drilled wood newel to the rail, so plan the post locations and the conduit or cable path in them before the rail is fabricated. Turns, landings and joints between rail sections are where the strip is cut and reconnected; leave a way to reach those joints, either through a removable end cap or a short service section.
Two cautions. Handrail size and graspability are regulated, so a light channel added under a rail shouldn't change the grip profile; confirm with the inspector. And outdoors, the whole assembly, including the post wiring, has to suit a wet location.
Sensors and Stair Chase Controllers
Stair light that switches on by itself gets used. Three common setups:
- Motion sensors at top and bottom that turn on the whole stair for a set time. Simple, works with any wiring layout, and pairs with a daisy-chain feed.
- Sequential "stair chase" controllers that light the treads one after another in the direction you're walking, hold, and then fade out in the same order. They need one output per tread, so they need individual leads to each step. Check how many steps the controller supports, the current per output and whether it offers a dim standby level that keeps the stair faintly lit all night.
- Addressable strip for animated effects such as a moving glow that follows you. A data line daisy-chains through the treads, so you don't need fourteen home runs, but each tread still needs adequate power, and the data run between treads has to stay within the controller's limits. Our SPI vs DMX guide covers which protocol fits a stair.
Where the stair light is the required stairway lighting rather than an extra layer, the control has to satisfy those rules too, typically switching from both the top and the bottom. Sensors are often accepted alongside or in place of switches, but that's the inspector's call.
Output Levels and Color Temperature
Stairs need less light than people expect. The eye is adapted to a dim hallway, and the treads are a few feet away. Typical figures:
- Night path, dim standby: typically 50 to 100 lm/ft, or a brighter strip dimmed to 20 to 30%.
- Comfortable everyday step lighting: typically 100 to 200 lm/ft.
- Step light that is also the main stair light: typically 200 to 300 lm/ft, with a dimmer.
Size for the upper number and dim down. A strip that is too weak can't be fixed later without replacing it. Warm white, 2700K or 3000K, suits almost every residential stair; at night, cooler light feels harsh and flattens the contrast between tread and riser. The same toe-level logic applies to kitchens, so if the stair opens onto one, match the CCT to the toe kick lighting.
Outdoor Stairs
Exterior steps add water, freeze-thaw, ice melt and UV. A few rules:
- IP rating. Covered steps that only see blowing rain typically use IP65 strip. Treads where water sits, snow is shoveled or a hose is used need IP67 or higher. The IP ratings guide explains the difference, and the product's spec sheet says what each assembly is rated for.
- Channels with drainage in mind. Recessed stair and in-floor channels must not form a trough that holds water against the strip. Slope the tread slightly away from the channel and seal every end cap and cable entry.
- Drivers indoors or in a rated enclosure. Keep the driver out of the weather, and remember that Class 2 limits are tighter for wet locations.
- Salt and sealants. De-icing salt is hard on aluminum finishes and seals, so check the channel's finish and the strip jacket for outdoor use.
Safety: Even Edges, No Glare
The point of stair light is that every step looks like every other step. A single dark tread, a dead section or one cooler strip reads as a change in the stair and makes people hesitate or miss a step. Light the edge of every tread, including the top nosing at the landing, at the same level and the same CCT, from the same production lot if you can.
Then check glare from the top. People walking down look at the treads ahead of them, so any source visible from above sits directly in their line of sight. Under-nosing strip is shielded by the nosing; wall lights and handrail lights should be shielded or aimed down so nothing bright faces up the stair.
Codes treat stair lighting as a safety item. Requirements for illumination, switching and emergency lighting on egress stairs vary by occupancy and jurisdiction, so confirm the plan with your inspector or a licensed electrician before rough-in.
Worked Example: 14 Treads, 3 ft Wide
A closed-riser interior stair, 14 treads, each 3 ft wide, with a 24V strip listed at 3 W/ft under every nosing. The driver goes in the closet under the stair, at the bottom.
- Total strip: 14 × 3 ft = 42 ft.
- Load: 42 ft × 3 W/ft = 126 W.
- One driver: 126 ÷ 0.8 = 157.5 W minimum, so a 200 W unit. That's above 100 VA, so it isn't Class 2, and it puts 5.25 A on the feed.
- Two Class 2 zones instead: treads 1 to 7 and 8 to 14, 21 ft each. 21 × 3 = 63 W per zone, and 63 ÷ 0.8 = 78.75 W, so a 96 W Class 2 driver for each. Class 2 outputs keep the low-voltage wiring simple.
- Current per zone: 63 ÷ 24 = 2.63 A.
Feed wire, worst case (the whole zone current carried to the far tread):
| Zone | Wire path | Gauge | Drop | % of 24V |
|---|---|---|---|---|
| Treads 1 to 7 | 10 ft | 18 AWG | 0.34 V | 1.4% |
| Treads 8 to 14 | 20 ft | 18 AWG | 0.67 V | 2.8% |
| Treads 8 to 14 | 20 ft | 16 AWG | 0.42 V | 1.8% |
Use 18 AWG for the lower zone and 16 AWG for the upper one. With a stair chase controller instead, each tread draws 9 W, or 0.375 A, and a 22 AWG lead 20 ft long drops 0.24 V (1.0%), so light individual leads are fine. The power supply calculator does the load and driver math for other widths and wattages.
Common Mistakes
- Strip on the riser face, aimed out. It lights the eyes of everyone walking down, not the treads.
- Visible dots on glossy treads. Polished surfaces double the problem. Use COB or a deep opal diffuser.
- Daisy-chaining, then asking for a chase effect. A step-by-step sequence needs a lead per tread. Decide before the skirt boards go on.
- Grazing a rough riser. Every seam and roller mark shows. Finish the risers to suit the light.
- Skipping the top nosing. The first step down from a landing is the one people miss.
- Driver sealed in the stair. It will fail eventually, and it has to be reachable.
- Mixed strips. Different output or CCT from tread to tread looks like a defect and makes the stair harder to read.
- Interior strip on exterior steps. Water finds every unsealed end cap.
Frequently asked questions
Where should LED strip go on stairs?
Under the nosing of each tread, aimed down so the light grazes the riser and lands on the step below. That lights every edge and keeps the strip out of sight. Wall-recessed lines and handrail lighting are the alternatives when the treads can't be modified.
How bright should LED stair lighting be?
Typically 100 to 200 lm/ft for everyday step lighting and 50 to 100 lm/ft for a night path. Size for the higher figure and use a dimmer, since a strip that is too weak can't be turned up later.
How do you power LED strip on each stair?
Either daisy-chain short jumpers from tread to tread behind the skirt board, or run an individual lead from each tread back to a distribution block or controller. Individual leads are required for sequential stair chase effects with single-color strip.
Can LED stair lighting be used outdoors?
Yes, with strip and channels rated for the location: typically IP65 for covered steps and IP67 or higher where water sits on the treads. Keep the driver indoors or in a rated enclosure and seal every end cap and cable entry.
What color temperature is best for stair lighting?
Warm white, 2700K or 3000K, for nearly every residential stair. It's comfortable at night and keeps good contrast between the tread and the riser.
Specify with ENKORA
Working on a project? Send us the drawings and we will propose strips, profiles and drivers that fit together.