Toe Kick LED Strip Lighting: Layout, Channels and Motion Sensors
Where a toe kick LED strip should sit, how to keep it out of sight on glossy floors, and how to wire a kitchen run with a motion sensor and the right driver.
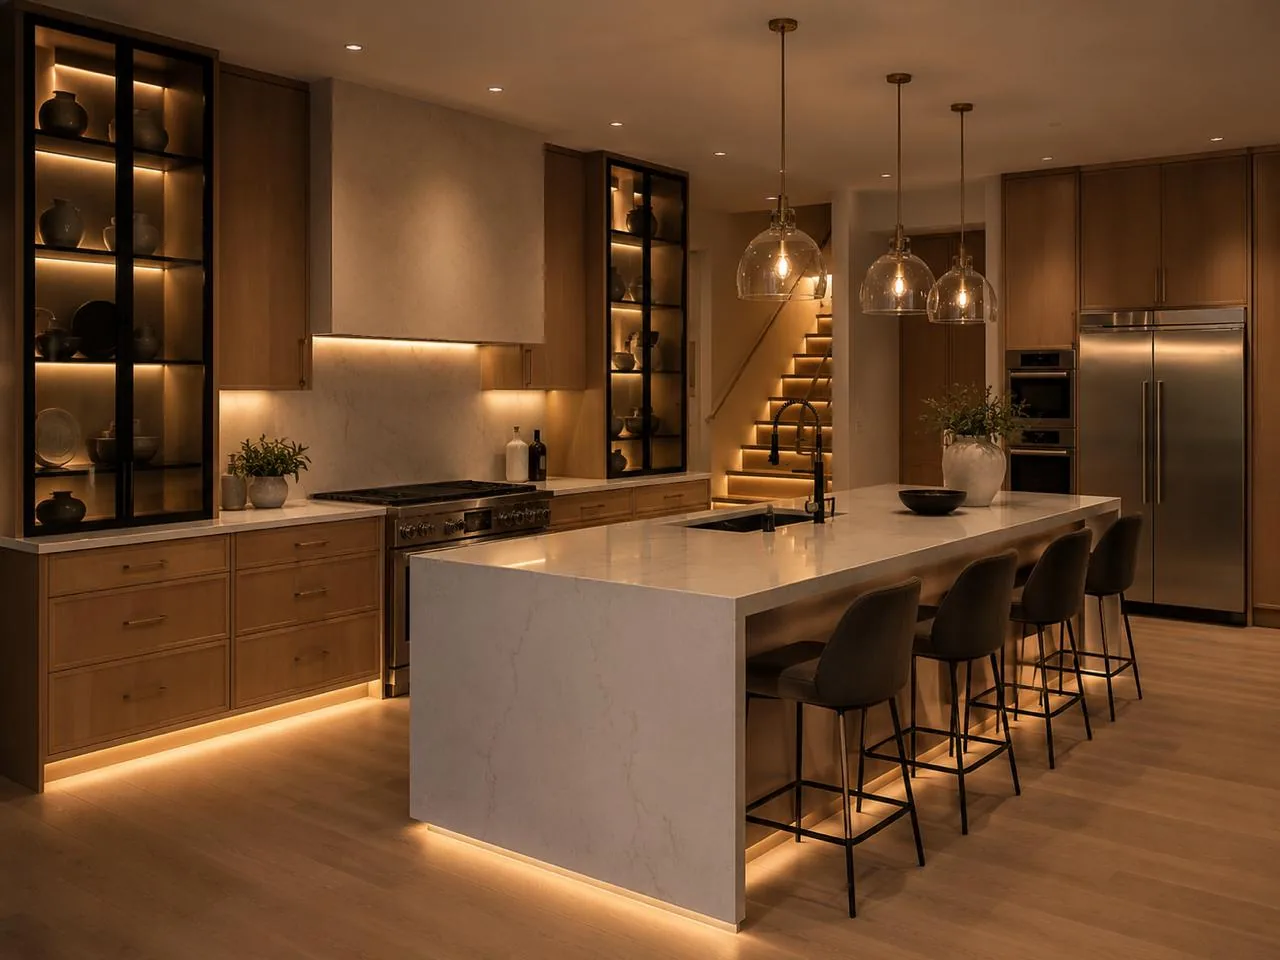
A toe kick LED strip is a low-output strip mounted in the recess under base cabinets, aimed at the floor so the cabinets seem to float and you can find your way across the room at night without switching on the overheads. Done well, you see a soft band of light on the floor and never the strip itself. Done badly, you see a row of bright dots mirrored in a polished floor and a strip that glares at anyone sitting at the island.
The difference comes down to four decisions: where the strip mounts, what channel holds it, how bright and warm it is, and how it's controlled. The wiring and driver sizing are simple once those are settled.
Where to Mount the Strip
A standard base cabinet sits on a toe kick about 4 in. high, recessed about 3 in. behind the cabinet face. That recess gives you three surfaces to work with, and each one throws light differently.
Underside of the cabinet box, aimed down. The strip goes on the bottom of the cabinet floor, in the overhang between the kick face and the cabinet front. Light drops straight onto the floor and grazes the kick face behind it. Keep the strip set back at least 1/2 in. from the cabinet's front edge so the lens stays hidden behind the door or drawer front from standing height.
Top of the kick face, in a 45° corner channel. The channel tucks into the inside corner where the kick board meets the cabinet bottom and aims out and down. You get a wider wash that reaches farther onto the floor, and the source sits deeper in the shadow of the overhang. For most kitchen base cabinets this is the placement we'd pick first.
Mid-height on the kick face, aimed straight out. It's the easiest to install and the worst to look at. The lens is visible from across the room, light shoots horizontally instead of onto the floor, and on a glossy floor the strip shows up as a bright reflected line. Use it only where nothing else fits, and then with a deep opal lens.
The setback matters more than people expect. Crouch down to the eye height of a child or a seated adult at the island and look at the toe kick. If you can see the lens from there, the strip is too far forward.
| Placement | Effect on the floor | Best for |
|---|---|---|
| Underside of cabinet box, aimed down | Defined band close to the cabinet, light also grazes the kick face | Islands with a deep overhang, floating vanities |
| Top of kick face, 45° corner channel | Wider, softer wash that reaches farther out; source well hidden | Standard kitchen base cabinets |
| Mid-height on kick face, facing out | Horizontal throw, little light on the floor, visible lens | Tight retrofits where nothing else fits |
| Recessed in plinth top (frameless cabinets) | Clean line, light hugs the plinth | European-style cabinets with leg-mounted plinths |
Channels and Angled Profiles
A toe kick gets kicked, mopped and vacuumed. Bare tape on a kick board won't survive the first robot vacuum. Put the strip in an aluminum channel with a diffuser: it protects the strip, carries heat away, and gives you a straight line even where the kick board is wavy.
For the 45° placement, a corner channel is the right tool. It sits in the inside corner and aims the strip at the floor at an angle, so you get more of the light where you want it and less glare toward the room. For the underside placement, a shallow surface channel works, and on new cabinets a millworker can route a groove so the channel sits flush.
Before you order, measure the actual kick. Heights vary from about 3 1/2 in. to 6 in. depending on the cabinet line, and adjustable leg systems leave a gap behind a clip-on plinth that changes where you can mount anything. The cabinetry and millwork collection groups strips and channels that suit these shallow spaces.
Why COB Strip Suits Glossy Floors
On carpet or matte wood, a dotted SMD strip in a diffused channel looks fine. On polished stone, polished concrete, glossy tile or many LVP finishes, the floor acts as a mirror. Each LED shows up as its own reflected point, and the effect looks cheap no matter how good the strip is.
COB strip packs its chips so densely under a continuous phosphor line that it reads as one unbroken line of light, even before a diffuser. Its reflection is a smooth line too. In a shallow toe kick channel, where there's little room to put distance between the LEDs and the lens, that's the most reliable way to avoid dots. Browse COB strips and pair them with an opal (frosted) lens for the softest result.
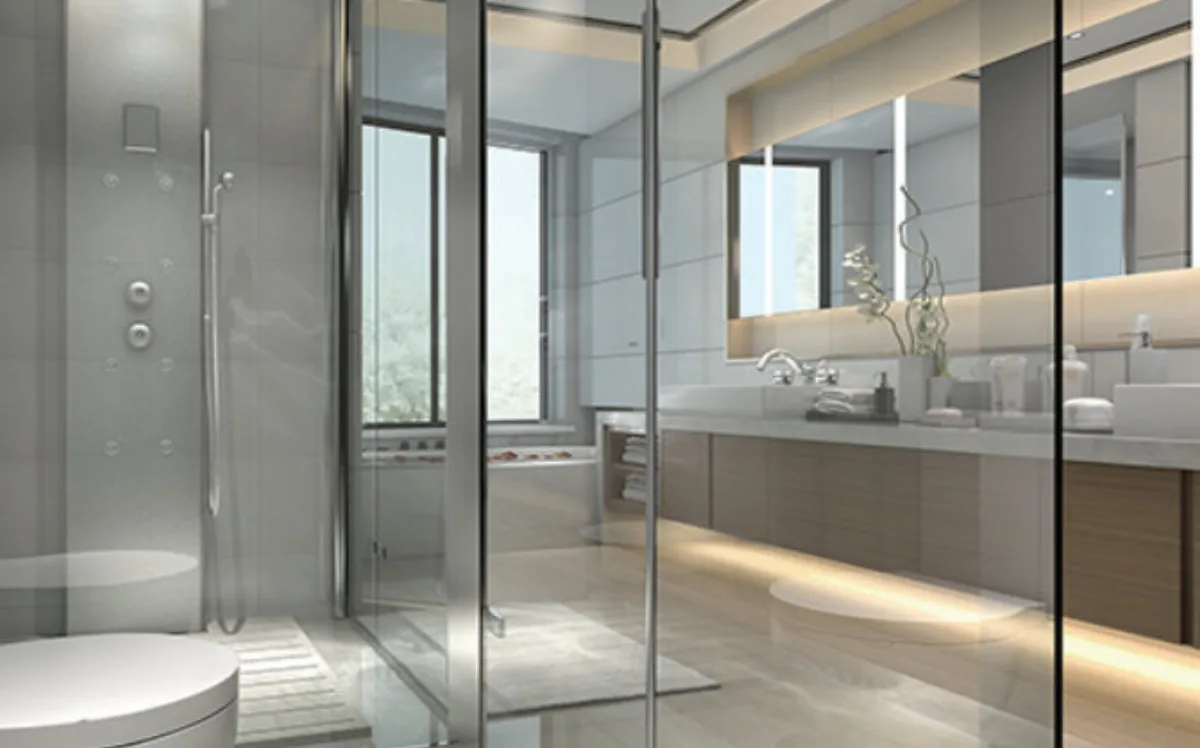
On a mirror-like floor, aim matters as much as strip type. The more the strip points down and back toward the kick, the less of the source you'll see reflected. The more it points out into the room, the more the floor shows you the lens.
Output and Color Temperature
Toe kick light is accent light. It doesn't need to light the floor so much as mark it. Typical figures:
- Accent toe kick in a kitchen: typically 100–200 lm/ft.
- Night path in a bath or hallway: typically 50–100 lm/ft, or the same accent strip dimmed to 20–30%.
- Above about 200 lm/ft: the floor starts to read as a lit stage, and every crumb and scuff shows.
For color temperature, 2700K is the usual choice for anything that turns on at night. It's easy on eyes adjusted to the dark and matches warm interiors. 3000K works if the kitchen's other lighting is 3000K and the toe kick runs mostly in the evening. Keep the toe kick CCT matched to the under-cabinet lighting if both are on together; our under-cabinet lighting guide covers that layer.
Choose a strip with high CRI if the floor is natural wood or stone. Low-CRI light makes warm wood and stone look flat and muddy.
Motion Sensors, Timers and Dimming
The most useful toe kick lighting turns itself on. A motion sensor lights the path when someone walks into the kitchen or bathroom at 2 a.m. and switches off after a set hold time.
What to look for:
- Sensor location: mount it in the kick face or under the cabinet front so it sees legs and feet, not the far side of the room. A sensor hidden too deep in the recess sees nothing.
- Hold time: typically adjustable from about 30 seconds to several minutes. For a bathroom night path, 1–2 minutes is usually right.
- Light-level threshold: a daylight setting keeps the sensor from switching the strip on in a sunny kitchen.
- Current rating: many sensors switch the 12V or 24V DC side between driver and strip. Check that the sensor's amp rating covers the run it switches.
For manual control, pair the toe kick with a dimmer so it can run at full output during a party and at 10–20% overnight. The dimmer and driver have to match: a phase dimmer needs a phase-dimmable driver, 0–10V needs a 0–10V driver, and a DC-side PWM dimmer needs a constant-voltage supply. The dimming and control guide explains each method and where it fits.
Some installers combine both: a sensor triggers the strip at a low night level, and a wall control brings it to full output when the room is in use.
Layout Around Appliances, Corners and End Panels
A kitchen toe kick is never one continuous run. The dishwasher, the range, inside corners and end panels all break it up.
Dishwasher. The dishwasher has its own kick plate, usually at a different depth. Most designers simply stop the strip on either side and accept the break. Carry the circuit across with a jumper wire routed low along the wall behind the appliance, clipped, clear of the water supply, drain hose and the dishwasher's electrical box, with enough slack to pull the unit out for service.
Range. Treat a freestanding range the same way, but keep any jumper clear of the gas connection, the receptacle and the anti-tip bracket. If routing behind the range is awkward, give each side its own feed back to the driver.
Inside and outside corners. COB and SMD tape can't bend flat around a 90° corner. Cut at a marked cut point and join with a short jumper or an L connector. Cut intervals vary by product, so check the spec sheet and plan cabinet-by-cabinet lengths before you cut.
End panels. Where a full-height end panel meets the floor, the kick stops. End the strip 1–2 in. short of the panel so you don't get a hot spot on its inside face.
Islands. Light the sides people see. The seating side under a counter overhang is often already shadowed and can be skipped, or lit at a lower level so seated guests aren't looking at a lens.
Power: Driver Location and Wiring
A toe kick run is low wattage, so it almost always runs on a single small driver or two, kept somewhere you can reach.
- Sink base or an adjacent cabinet is the usual spot. Mount the driver high on a side wall, away from the trap and supply lines. Don't plug it into the switched receptacle that feeds the disposal.
- Inside the toe space works only behind a removable kick panel, and that space near a sink or dishwasher is prone to moisture.
- Never seal a driver behind a fixed panel. It will need replacing someday, and an inspector will want to see it.
Run the low-voltage feeds through the cabinet backs and side panels, drilling clean holes and keeping wire away from drawer slides and hinges. Use cable rated for the location (CL2 or CL3 marking where it runs in walls). A driver whose output is listed as a Class 2 power source (limited to 100 VA) keeps the wiring on the low-voltage side simpler, which is why kitchens with longer runs are often split across two drivers. Confirm the details with a licensed electrician and the local inspector.
Moisture. Kick boards get splashed every time the floor is mopped, and bathrooms add steam and overflow. An IP65 strip (silicone-coated) or a channel with sealed end caps is worth considering in kitchens and baths. Ratings vary by product, so check the spec sheet. The IP ratings guide lists what each rating means in practice.
Worked Example: An L-Shaped Kitchen With an Island
Here's a typical kitchen, using a 24V COB strip at 3 W/ft. That wattage is a placeholder: use the figure on your strip's spec sheet.
| Run | Strip length | Load at 3 W/ft |
|---|---|---|
| Sink wall (dishwasher skipped) | 10 ft | 30 W |
| Range wall (two 4 ft sections either side of a 30 in. range) | 8 ft | 24 W |
| Island (front and both ends) | 14 ft | 42 W |
| Total | 32 ft | 96 W |
On one driver, 96 W ÷ 0.8 = 120 W. That's above the 100 VA limit for a Class 2 power source, and the island needs its own feed from the floor anyway, so split it.
- Perimeter (sink and range walls): 18 ft × 3 W/ft = 54 W. 54 ÷ 0.8 = 67.5 W, so a 96 W driver in the sink base. Current is 54 ÷ 24 = 2.25 A.
- Island: 14 ft × 3 W/ft = 42 W. 42 ÷ 0.8 = 52.5 W, so a 60 W driver in an island cabinet. Current is 42 ÷ 24 = 1.75 A.
- Voltage drop, perimeter feed: 15 ft of 18 AWG carrying the full 2.25 A. Drop = 2 × 15 × 2.25 × 0.006385 Ω/ft = 0.43 V, about 1.8% of 24V. No problem.
- Voltage drop, island feed: 12 ft of 18 AWG at 1.75 A. Drop = 2 × 12 × 1.75 × 0.006385 = 0.27 V, about 1.1%.
The power supply calculator does the sizing step for any run length and strip.
Common Mistakes
- Strip too far forward. The lens shows from a seated or child's eye height. Set it back and check from low down before you stick it.
- SMD on a polished floor. Every dot shows twice: once on the strip, once in the floor. Use COB with an opal lens.
- Too bright. A toe kick at under-cabinet output turns the floor into the brightest surface in the room. Specify low output or dim it.
- Cool white at night. 4000K at 2 a.m. feels like an operating room. Stay at 2700K for night paths.
- Driver buried. A driver screwed inside a closed toe space or behind a fixed panel becomes a demolition job when it fails.
- No slack at appliances. A jumper pulled tight behind the dishwasher tears out the first time the unit comes out for service.
- Bare tape on the kick. Adhesive lets go, the strip sags, and the mop finishes it off. Use a channel.
Frequently asked questions
Where should an LED strip go in a toe kick?
Mount it under the cabinet box or in a 45° corner channel at the top of the kick face, aimed at the floor. Keep it set back at least 1/2 in. from the cabinet front so the lens can't be seen from standing or seated height.
How bright should toe kick lighting be?
Toe kick lighting is accent light: typically 100–200 lm/ft for a kitchen and 50–100 lm/ft for a night path. Dimming a stronger strip to 20–30% works too.
What color temperature is best for toe kick lights?
2700K is the usual choice, especially for lights used at night. Match the under-cabinet lighting if both run at the same time.
Can toe kick lights work with a motion sensor?
Yes. A motion sensor in the kick face or under the cabinet front turns the strip on for a set hold time, often 30 seconds to a few minutes. Check that the sensor's current rating covers the run it switches.
Do toe kick LED strips need to be waterproof?
Kick boards get splashed when floors are mopped, so an IP65 strip or a sealed channel is worth considering in kitchens and bathrooms. Ratings vary by product, so check the spec sheet.
Specify with ENKORA
Working on a project? Send us the drawings and we will propose strips, profiles and drivers that fit together.