How to Install an LED Strip in a Shower Niche: Placement, IP Rating and Rough-In
Where the strip goes in the niche, what rating it needs, how the leads get through the waterproofing, and why the whole job is decided before the tile goes up.

An LED strip in a shower niche works well when three things are right: the strip is rated for direct spray (IP67 or better, with sealed ends), it sits in a tile-in aluminum channel that hides the dots and the glare, and the driver lives outside the wet area where someone can reach it. Get those three right and a lit niche is one of the cheapest upgrades in a bathroom remodel. Get one wrong and you're cutting tile to replace a dead strip in two years.
Shower niche lighting is a rough-in decision. Once the membrane is on and the tile is set, your options shrink to almost nothing, so everything below assumes the walls are still open.
Where the Strip Goes in the Niche
Most niches are lit from one of three positions, and each one changes what you see.
Top, facing down. The strip sits in the niche's top return (the "ceiling" of the niche) and washes down the back wall. This is the default for good reason. The source is above eye level for most people, so you see the lit back wall and the bottles, not the LEDs. Set the channel close to the front edge of the niche and the light falls evenly down the back wall. Set it tight against the back wall and you get a strong graze, which shows off textured tile and also every bit of lippage on large-format tile.
Sides, facing in. Vertical strips on both side returns light the niche from left and right. It looks good on a tall niche, but you're now looking almost straight into the source when you stand at an angle. Side strips need a deeper channel or a more diffusing lens, and they cast shadows of bottles onto each other.
Back wall, facing out. Avoid this one. A strip on the back wall shines straight at the person in the shower, and in glossy tile you get a reflected line on every surface.
| Position | Glare | Shadows | Best for | Watch out for |
|---|---|---|---|---|
| Top return, near the front edge | Low; source above eye level | Short shadows below shelves and bottles | Most niches | Make sure the channel depth fits tile plus setting bed |
| Top return, near the back wall | Low | Strong grazing shadows | Textured or 3D tile | Shows lippage on flat large-format tile |
| Both side returns | Medium; visible from an angle | Bottles shadow each other | Tall, narrow niches | Needs a deeper channel or opal lens |
| Back wall | High | Flat, no modeling | Rarely a good choice | Glare and reflections in glossy tile |
| Shower ceiling or soffit | Low if recessed | Depends on layout | General shower light | Falls under the bathtub and shower zone rules below |
A niche with a mid-height shelf usually needs a second strip under the shelf, or the lower compartment goes dark. Plan both runs at rough-in, since the shelf strip needs its own lead.
IP Rating: What the Spray Zone Needs
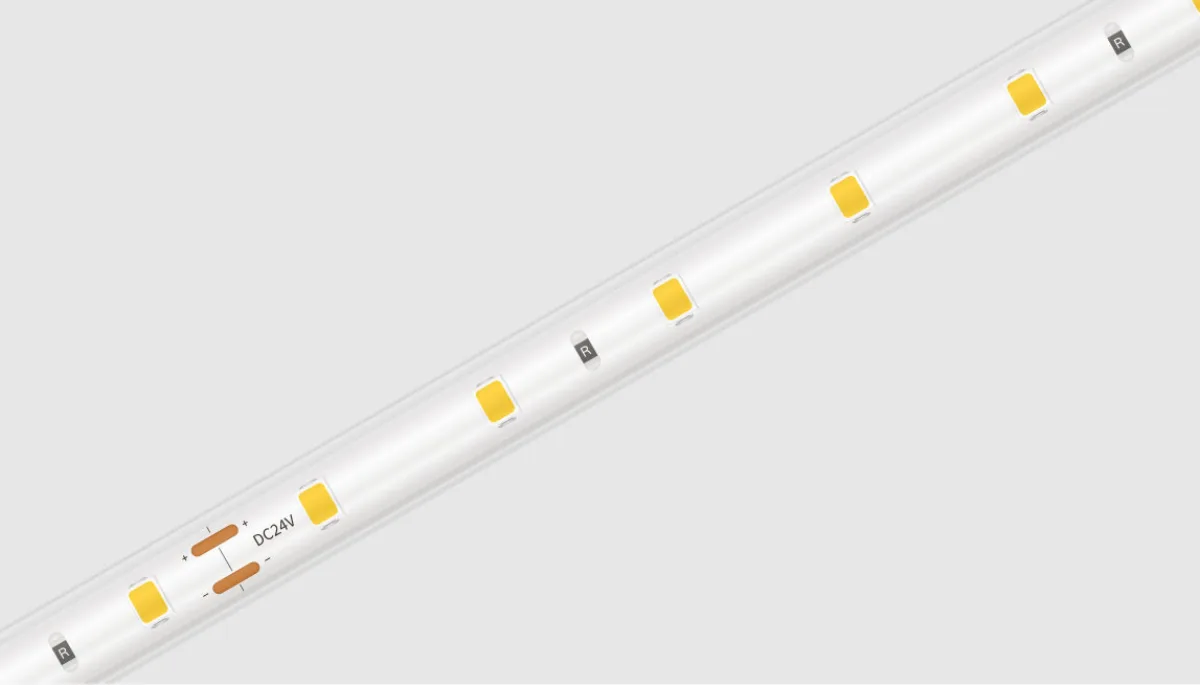
Inside the shower, the strip gets direct spray, steam and cleaning chemicals. Treat it as a wet location and specify a strip that is at least IP67: fully encapsulated in silicone, with factory-sealed or properly field-sealed end caps. IP65 strips (a coating on top, open back) are fine at a vanity mirror, but in a niche the water gets under the coating at the cut end and the copper starts to corrode. The IP ratings guide explains what each digit is tested for.
The weak points are never the middle of the strip. They are:
- the cut end, where you sealed it on site;
- the lead entry, where the wire leaves the silicone;
- any splice you made inside the wet area (avoid them entirely).
Order the strip cut to length with factory end caps where you can. If you cut on site, use the end caps and sealant the product is designed for, and use a neutral-cure silicone. Acid-cure (vinegar-smell) silicone releases acetic acid as it cures, which attacks copper contacts. Browse waterproof strips and check the IP rating and the end-sealing method on each spec sheet before you buy.
Low Voltage and the Driver Location
An LED strip in a shower runs on 12V or 24V DC from a driver, and that driver should be a Class 2 power supply. Class 2 limits the available power (100 VA maximum) so the low-voltage side carries far less risk of shock or fire. NEC Article 725 covers Class 2 circuits. A Class 2 source does not make a wet location safe on its own, but it's the right starting point and most inspectors will expect it.
The driver itself never goes in the wet area. Put it somewhere dry and accessible:
- inside the vanity cabinet, on the back panel;
- in an adjacent closet or linen cabinet;
- in the attic or a ceiling space above, behind an access panel;
- in a low-voltage enclosure on the far side of the shower wall, with an access door.
"Accessible" means you can reach it without removing tile or drywall. Drivers are the part most likely to fail first, and a driver buried behind finished drywall is a code problem as well as a service problem. The 120V AC circuit feeding the driver is ordinary branch wiring and gets the protection your electrician and inspector call for in a bathroom (GFCI protection is common).
The bathtub and shower zone
NEC 410.10(D) sets rules for luminaires near bathtubs and showers. In general terms, it defines a zone around the tub rim or shower threshold (3 ft horizontally and 8 ft vertically in recent editions) where cord-connected and hanging fixtures are not allowed, and where luminaires inside the tub or shower footprint must be marked for damp locations, or wet locations where they are subject to shower spray. A niche strip and a strip in the shower ceiling both sit squarely in that zone. Editions and local amendments differ, so confirm the requirements with your inspector before you buy the product, not after.
Getting the Leads Through the Waterproofing
Every wire that goes from the niche to the driver passes through the waterproofing. That penetration is where showers leak, so treat it like a valve or showerhead penetration.
- Keep it small and single. One hole per lead, just large enough for the cable. Don't route through a large opening and fill it with sealant.
- Follow the membrane maker's instructions. Sheet membranes and liquid-applied membranes each have their own method for sealing a penetration: a pre-formed seal or collar, a fabric patch embedded in the membrane, or a specified sealant. Use the method and products that membrane system calls for, so the warranty and the waterproofing both stay intact.
- Run the lead uphill to the hole if you can, then down to the driver on the dry side, so water that tracks along the cable has a loop to drip from.
- Flood test with the leads in place. If your installer floods the pan or tests the walls, do it after the penetrations are sealed.
Never make a splice inside the niche or inside the wall cavity behind the membrane. Bring a continuous lead from the strip out to a dry, accessible junction near the driver.
Tile-In Channels and Diffusers
A tile-in (recessed) aluminum channel is what makes a lit niche look built in rather than added on. The channel's flanges sit behind or flush with the tile, so the tile edge dies into the lens line. It also gives the strip a straight, rigid mounting surface and some heat sinking.
When you choose the channel from the channels range:
- Match the depth to the build-up. Add the backer board, membrane, thinset and tile thickness, and pick a channel whose face lands flush with the finished tile.
- Match the internal width to the strip. A silicone-encapsulated strip is wider and taller than a bare one. Check the strip's outside dimensions against the channel's inner width.
- Pick an opal (frosted) lens. At niche distances you're a foot or two from the strip. A clear lens shows every dot; an opal lens gives a clean line. A COB strip behind an opal lens is the smoothest result.
- Plan the ends. End caps on the channel, and a small bead of neutral-cure silicone where the lens meets the cap, keep the worst of the water out of the channel. Assume some water gets in anyway; that's why the strip itself must be IP67.
Color Temperature, CRI and Dimming
Match the rest of the bathroom. In homes, 2700K or 3000K niche light sits well beside warm vanity lighting; 3500K or 4000K suits a cooler, contemporary bathroom with white or gray stone. Mixing a 4000K niche into a 2700K bathroom is the most common color mistake we see. The color temperature guide covers how to match sources.
CRI 90 or higher is worth it in a bathroom. Skin tones and natural stone look flat under low-CRI light, and a niche is often the brightest spot in the shower.
Niche lighting rarely needs to be bright. A lit niche reads well at modest output, and a dimmed niche makes a good night light. Plan for dimming at rough-in: a dimmable driver that matches the wall dimmer you're using (or a 0–10V or wireless controller), on its own switch leg separate from the main shower light. The bathroom and vanity collection groups strips suited to this kind of work.
Rough-In to Finish: The Sequence
This is the order that avoids cutting tile later.
- Lay out the niche and the light. Decide position (top return is the default), strip length and channel profile while framing is open. Mark the lead path to the driver location.
- Choose and confirm the driver location. Dry, accessible, within a sensible wire run. Have the electrician run the 120V feed there and confirm the zone rules with the inspector.
- Size the driver. Total strip watts ÷ 0.8 (see the worked example below).
- Frame and block. Add blocking so the channel has something solid behind it and the niche is square.
- Install backer board and pull the lead. Drill the single lead penetration at the planned spot. Pull the low-voltage cable through with enough service loop on both ends.
- Waterproof. Install the membrane, then seal the penetration using the membrane maker's method. Flood or test as your waterproofing system requires.
- Set the channel. Bed the tile-in channel so its face will land flush with the finished tile.
- Tile. The setter works the tile edges into the channel flanges. Protect the channel opening with tape.
- Install strip and lens. Fit the strip in the channel, connect to the lead at the dry side, test at full and low dim before the lens goes in, then fit the lens and seal the end caps.
- Commission. Check for color match against other bathroom lighting and confirm dimming has no flicker at the low end.
Worked example: sizing the driver for one niche
A niche 24 in wide and 12 in tall, lit with a top strip plus two side strips:
- strip length: 2 ft across the top + 2 × 1 ft down the sides = 4 ft;
- strip power: say the spec sheet lists 4.4 W/ft (use the number on your strip's spec sheet);
- load: 4 ft × 4.4 W/ft = 17.6 W;
- driver size: 17.6 W ÷ 0.8 = 22 W minimum, so a 30 W Class 2 driver;
- current at 24V: 17.6 W ÷ 24 V = 0.73 A.
Now the wire. The driver sits in an attic access 30 ft away (one way). On 18 AWG copper (6.385 Ω per 1,000 ft):
2 × 30 ft × 0.73 A × 0.006385 Ω/ft = 0.28 V drop, about 1.2% of 24V.
That's fine. On 20 AWG the same run drops about 0.45 V (1.9%), still acceptable. The power supply calculator does the driver math for you.
Common Mistakes
- IP65 strip in the spray zone. It works for a year or two, then the cut end corrodes and the run dies from that point on.
- Driver behind the tile. Sealed in the wall with no access panel. When it fails, the repair is demolition.
- Splices in the wall cavity. A connector inside a wet wall is a failure waiting to happen. Bring one continuous lead to the dry side.
- Big penetration, lots of sealant. A gap filled with caulk is not a membrane seal. Use the membrane system's own penetration method.
- Wrong channel depth. The channel sits proud of the tile, or so deep the tile setter has to cut around it. Measure the full build-up first.
- Acid-cure silicone on the ends. It smells like vinegar for a reason, and it corrodes copper.
- Treating a steam shower like a regular shower. Sustained heat and saturated air are a different environment. Read our notes on sauna and steam room lighting first.
Frequently asked questions
Can you put an LED strip in a shower niche?
Yes, if the strip is rated for direct spray (IP67 or better with sealed ends), runs on a Class 2 low-voltage supply, and the driver sits outside the wet area where it can be reached. Confirm the installation with your local inspector.
What IP rating do I need for LED strip in a shower?
Use IP67 or better anywhere the strip gets direct shower spray. IP65 is fine near a vanity mirror but not inside the shower, where water gets in at the cut ends.
Where should the LED driver go for shower niche lighting?
Somewhere dry and accessible: a vanity cabinet, adjacent closet, or attic or ceiling space behind an access panel. Never seal the driver behind tile or drywall.
Should the LED strip go at the top or sides of a shower niche?
Top is the default. A strip in the top return, near the front edge, washes the back wall evenly and keeps the source above eye level, while side strips are more visible and cast more shadows.
How do LED strip wires get through a shower waterproofing membrane?
Through one small penetration per lead, sealed with the method and products the membrane maker specifies, the same way you'd treat a valve penetration. Avoid splices inside the wet wall.
Specify with ENKORA
Working on a project? Send us the drawings and we will propose strips, profiles and drivers that fit together.